


Easily Create a Single Node Kubernetes Cluster
Table of Contents
I’ve been working with Kubernetes for a long time. Too long, actually. So long, in fact, that I don’t really use it much anymore. Kubernetes has won in terms of being the default way to deploy modern applications. At this point, it’s kind of boring, which is great! We want boring infrastructure. Boring works. If you’re writing a new application today, the target is going to be a container, and that container is probably going to run in good old boring Kubernetes.
For quite a while, the last few years, I have had a bunch of Kubernetes clusters running in my basement. I have half a rack there that used to be filled with servers. Then that changed to just running one larger server with a couple hundred gigs of memory, and that one server was running a bunch of Kubernetes clusters. But recently I shut that down. Mainly because it’s summer here in Toronto and that one big server was heating up the basement, and I wasn’t using it that much. I may turn it on again in the winter. Not sure. Anyways…
Yesterday I needed a small k8s cluster. So I used my good old install-kubernetes.sh script to install it onto a VM running on my local workstation.
tl;dr
- I have a 500 line bash script that installs Kubernetes on Ubuntu 22.04, usually a small VM, 8 gigs of ram, 2-4 CPUs, 40 gigs of disk.
- The script can create a single node “cluster”
- Or you can deploy a bunch of virtual machines and make one a control plane node and the other workers
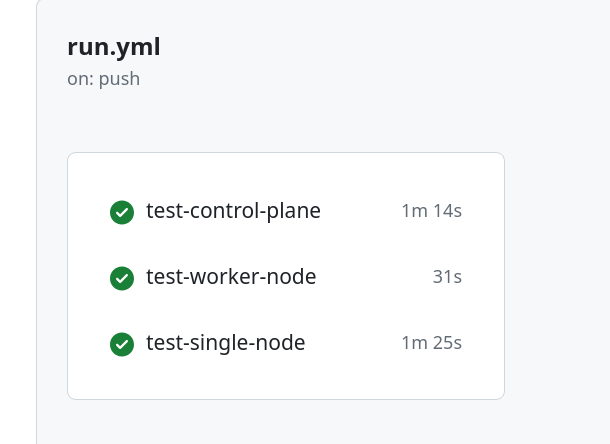
- It only takes 2 or 3 minutes to get a k8s cluster. Below is a picture of the test I ran in a github action. Of course, github’s infrastructure is blazing fast–the speed of the installation will largely depend on how fast you can download packages to the host.
There are other single node k8s tools, but I like mine, of course :)
Install Kubernetes
For a year and a half or so–first commit was March of 2023–I’ve had a script that will deploy a Kubernetes cluster into a virtual machine.
That script can be found here:
I haven’t used it for a while, and so it was actually broken for the last bit because the upstream Kubernetes project changed where the packages for Ubuntu are located. So I just updated the script, like bumped it to Kubernetes 1.31, fixed a few other things, and now it’s good to go again to create either a cluster of Kubernetes instances or, perhaps more useful, a full Kubernetes deployment running in a single virtual machine instance (where the single node is both a control plane node and a worker node).
Building a Single Node Kubernetes…“Cluster”
First, get yourself an Ubuntu 22.04 virtual machine with at least 8 gigs of ram and around 40 gigs of disk. I’d probably also give it 4 CPUs.
root@install-k8s-demo:~# source /etc/lsb-release; echo $DISTRIB_RELEASE
22.04
root@install-k8s-demo:~# nproc
4
root@install-k8s-demo:~# free -h
           	total    	used    	free  	shared  buff/cache   available
Mem:       	7.7Gi   	124Mi   	7.5Gi    	17Mi   	111Mi   	7.4Gi
Swap:         	0B      	0B      	0B
root@install-k8s-demo:~# lsblk
NAME   MAJ:MIN RM  SIZE RO TYPE MOUNTPOINTS
sda  	8:0	0   40G  0 disk
├─sda1   8:1	0  100M  0 part /boot/efi
└─sda2   8:2	0 39.9G  0 part /
Then, login to that VM and get a root shell.
Next, grab the install-kubernetes script.
NOTE: You’ll need git installed.
root@install-k8s-demo:~# git clone https://github.com/ccollicutt/install-kubernetes
root@install-k8s-demo:~# cd install-kubernetes
There will be a few files there:
root@install-k8s-demo:~/install-kubernetes# ls
install-kubernetes.sh  makefile  manifests  README.md
Then, we simply run the install-kubernetes.sh script BUT using the “-s” option to set it so that it deploys a single node control plane + worker node.
NOTE: If you forget the “-s”, it is probably best to recreate the virtual machine and reinstall it. This is not idempotent, or at least it hasn’t been tested that way.
./install-kubernetes.sh -s
The output of that will look like:
root@install-k8s-demo:~/install-kubernetes# ./install-kubernetes.sh -s
Starting install...
==> Logging all output to /tmp/install-kubernetes-NMxK9WTKim/install.log
Checking Linux distribution
Disabling swap
Removing packages
Installing required packages
Installing Kubernetes packages
Configuring system
Configuring crictl
Configuring kubelet
Configuring containerd
Installing containerd
Starting services
Configuring control plane node...
Initialising the Kubernetes cluster via Kubeadm
Configuring kubeconfig for root and ubuntu users
Installing Calico CNI
==> Installing Calico tigera-operator
==> Installing Calico custom-resources
Waiting for nodes to be ready...
==> Nodes are ready
Checking Kubernetes version...
==> Client version: v1.31.0
==> Server Version: v1.31.0
==> Requested KUBE_VERSION matches the server version.
Installing metrics server
Configuring as a single node cluster
Configuring as a single node cluster
Deploying test nginx pod
Waiting for all pods to be running...
Install complete!

### Command to add a worker node ###
kubeadm join localhost:6443 --token <redact> --discovery-token-ca-cert-hash sha256:<redact>
Now You Have a Kubernetes Cluster
At this point, you can run kubectl and access the local cluster.
There’s a kubeconfig in:
root@install-k8s-demo:~# ls ~/.kube/
cache  config
And, if there is an ubuntu user on the host, the config will be there too.
root@install-k8s-demo:~# ls /home/ubuntu/.kube/
config
And we can connect to the “cluster”.
root@install-k8s-demo:~# kubectl get pods -A
NAMESPACE      	NAME                                   	READY   STATUS	RESTARTS   AGE
calico-apiserver   calico-apiserver-78d48b5579-j97lc      	1/1 	Running   0      	4m15s
calico-apiserver   calico-apiserver-78d48b5579-kmcvr      	1/1 	Running   0      	4m15s
calico-system  	calico-kube-controllers-7d868b8f66-fldb5   1/1 	Running   0      	4m45s
calico-system  	calico-node-pqfdn                      	1/1 	Running   0      	4m45s
calico-system  	calico-typha-899c7464d-9vqzg           	1/1 	Running   0      	4m45s
calico-system  	csi-node-driver-vqvnx                  	2/2 	Running   0      	4m36s
kube-system    	coredns-6f6b679f8f-tvtjs               	1/1 	Running   0      	4m49s
kube-system    	coredns-6f6b679f8f-zvcdl               	1/1 	Running   0      	4m49s
kube-system    	etcd-install-k8s-demo                  	1/1 	Running   0      	4m57s
kube-system    	kube-apiserver-install-k8s-demo        	1/1 	Running   0      	4m56s
kube-system    	kube-controller-manager-install-k8s-demo   1/1 	Running   0      	4m57s
kube-system    	kube-proxy-9snr9                       	1/1 	Running   0      	4m49s
kube-system    	kube-scheduler-install-k8s-demo        	1/1 	Running   0      	4m56s
kube-system    	metrics-server-5f94f4d4fd-sg2gh        	1/1 	Running   0      	4m35s
tigera-operator	tigera-operator-b974bcbbb-4sjjz        	1/1 	Running   0      	4m49s
You Can Deploy Many Worker Nodes if You Want
You could also use this script to deploy a single control plane only node, the standard model for deploying K8s where the control plane is separated, and then create and add as many worker nodes to that control plane as makes sense. However, this script does not orchestrate all of this. You would have to log in to each VM and run the script, set it up as a worker node or a control plane node, and then join the worker nodes to the control plane node using the kubeadm join command. So this is not meant to be some kind of high-level k8s cluster creation orchestration mechanism, no magic here. Of course you can create as large a cluster as you want, you just have to set up each node individually.
Some Design Decisions
If you look at the script, here are some design decisions. It’s using:
- Ubuntu Kubernetes packages
- containerd
- Calico as the CNI
Conclusion
If you need a throwaway Kubernetes cluster that can be created in an Ubuntu 22.04 VM in a few minutes (like two!) I think this is a nice way to do that. Certainly it works for me.